Mechanical disinfection remains the cornerstone of the management of Peri-implantitis. But do we best achieve our goals? From simply rinsing with saline and rubbing with a gauze to a whole Er:Yag Lazer, there is a whole spectrum of techniques and devices that seem to achieve comparable results. How do we choose and where do we strike the best balance?
As there seems to be no “one size fits all”, today we review the most common devices for mechanical disinfection of implants, under the light of clinical applicability. So let’s take a purely clinical standpoint today and discuss some clinical “tips and tricks” to help you make the most of each approach!
– Do plastic curettes have a role in the treatment of peri-implantitis? Shall we go for carbon fibre and titanium ones? Or forget about hand scalers altogether?
– What is the practical disadvantage of rubber-coated ultrasonic tips?
– Do we use the ultrasonic before or after a titanium brush? or shall I stick to “either /or”?
– is saline and gauze a “grandpa remedy” or still a meaningful option and when?
The questions are many they are all real and valid and raised during the last couple of months during our online masterclass in Mastering Implant Complications from students and colleagues! The answers however are few and very … personal, as we rely mostly on our clinical experience rather to make such choices. After several discussions with colleagues, I decided to compile some of my thoughts and personal suggestions in a practice-oriented and experience-based mini guide ! Your comments and thoughts are very welcome!
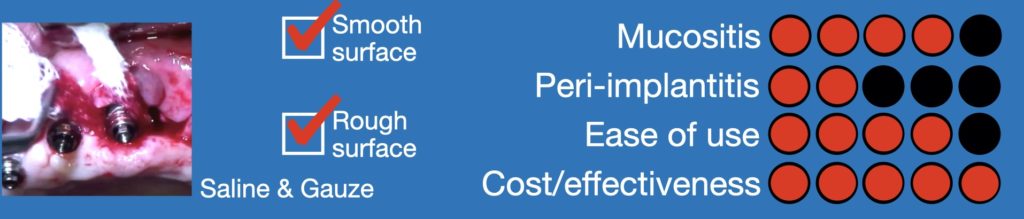
1. Saline and gauze!
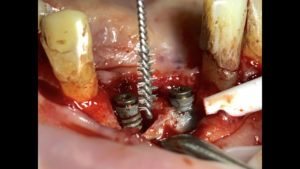
Today, this might sound to many as “grandpa” remedy or some sort of traditional medicine. It was the first, most humble and basic technique and indeed I learned it from a grandfather of Implant Dentistry, Prof. NP Lang. In Bern in the early 2000’s we used it with almost ceremonial respect in every case. After a thorough rinsing, a wet gauze is applied in a “shoe polish” manner, so that rubbing pressure in motion is applied for 2-3 min. Works very well against biofilm and even visible small calculus deposits. It’s most effective in cases with significant horizontal bone loss or at resective surgical approach, but not suitable for minor or intrabony defects. It soon became our standard to compare everything that followed, and guess what, clinical outcomes were at least not inferior. I still use it with the same ceremonial respect, only now I use it mostly at the end of the surgery and certainly after the ultrasonic. Why, well, read later.
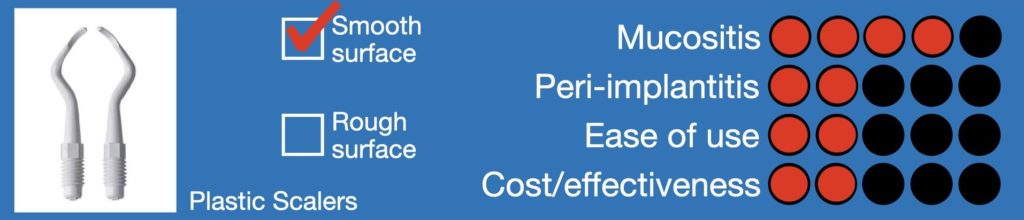
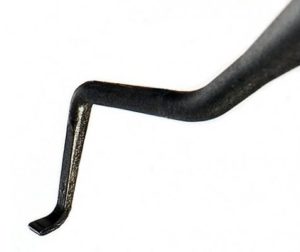
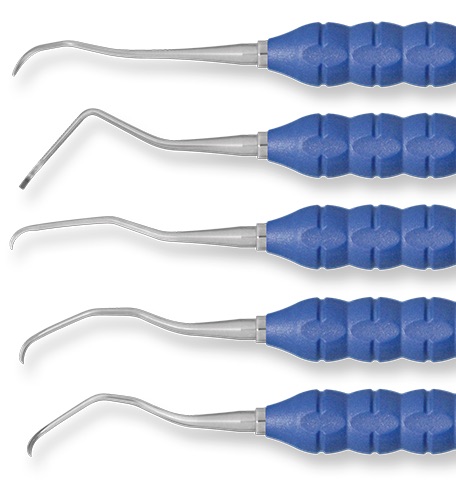
2. Plastic curettes
As a direct transfer from periodontitis treatment, plastic curettes were introduced for use with implants. Although such curettes can be reasonably sharp, they are quite “bulky” and difficult to use in the peri-implant pocket, unless the inflamed tissue is swollen and loose. They are effective against both biofilm and hard deposits, but their effectiveness is limited below the soft tissue level and in interproximal areas. Using them in peri-implantitis surgery against the rough surface is in my hands rather problematic. Their natural elasticity makes them easy to bounce against implant threads and rough surface, while they chip and break easily. Even if some systems have interchangeable curette tips, they do not come cheap either. Conclusively, in my hands this has been a mainly Mucositis instrument, usually in cases of overdentures or other removable designs.

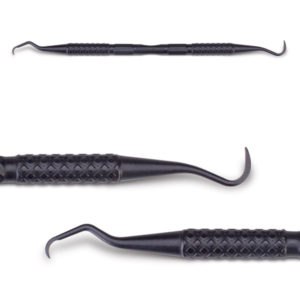
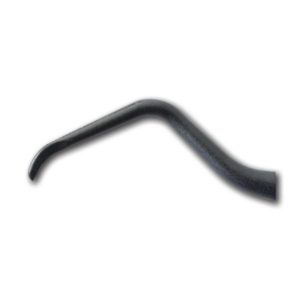
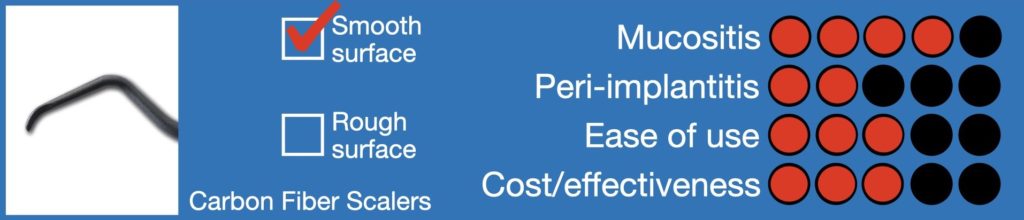
3. Carbon fibre curettes
The next step in implant currete evolution was the plastic reinforced with carbon fibre. These curettes can be thiner and easier to use under the soft tissue margin and interproximally. They are less “elastic” and they do not break that easy, but instead they go blunt fast and they cannot be sharpened. They give a better tactile sense than plastic ones, even against rough surface, so I would sometimes use the to “feel” the implant threads and surface, but once blunt their effectiveness is much reduced. Again, a mainly Mucositis instrument.
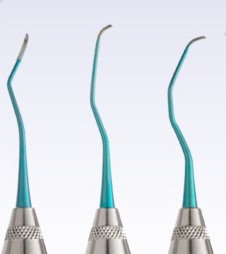
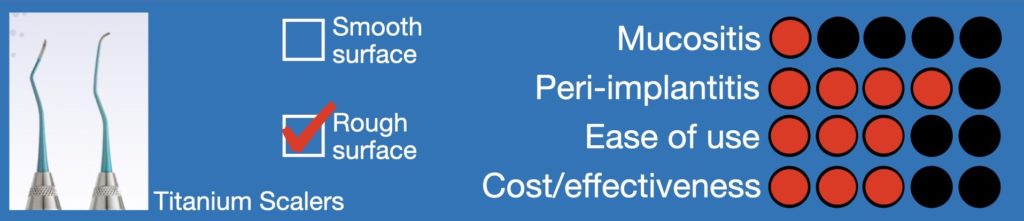
4. Titanium Curettes
The titanium curettes were introduced for disinfecting rough implant surfaces, as any use against smooth surface, abutment or prosthesis risks almost certainly to result in scratches. They are probably the most efficient curettes against hard deposits, but then again I was never fond of the feeling of scratching metal to metal while scaling. I wondered how patients might experience this as well. Not to mention that they wear out very fast when used against implant rough surfaces, when thin they tend to break and they don’t come cheap either… A Peri-implantitis instrument that never really found its way to my regular practice.
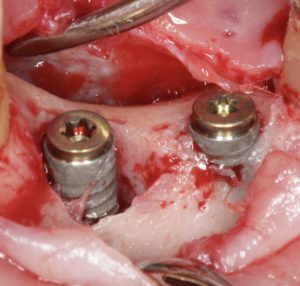
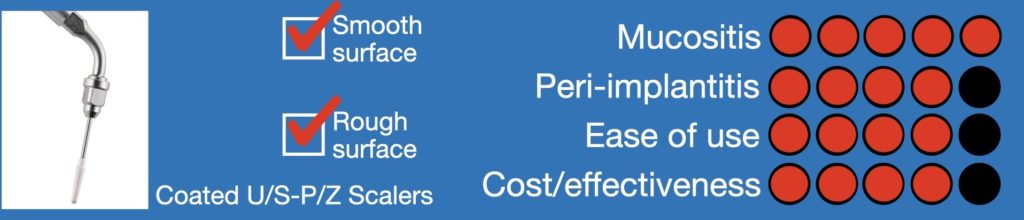
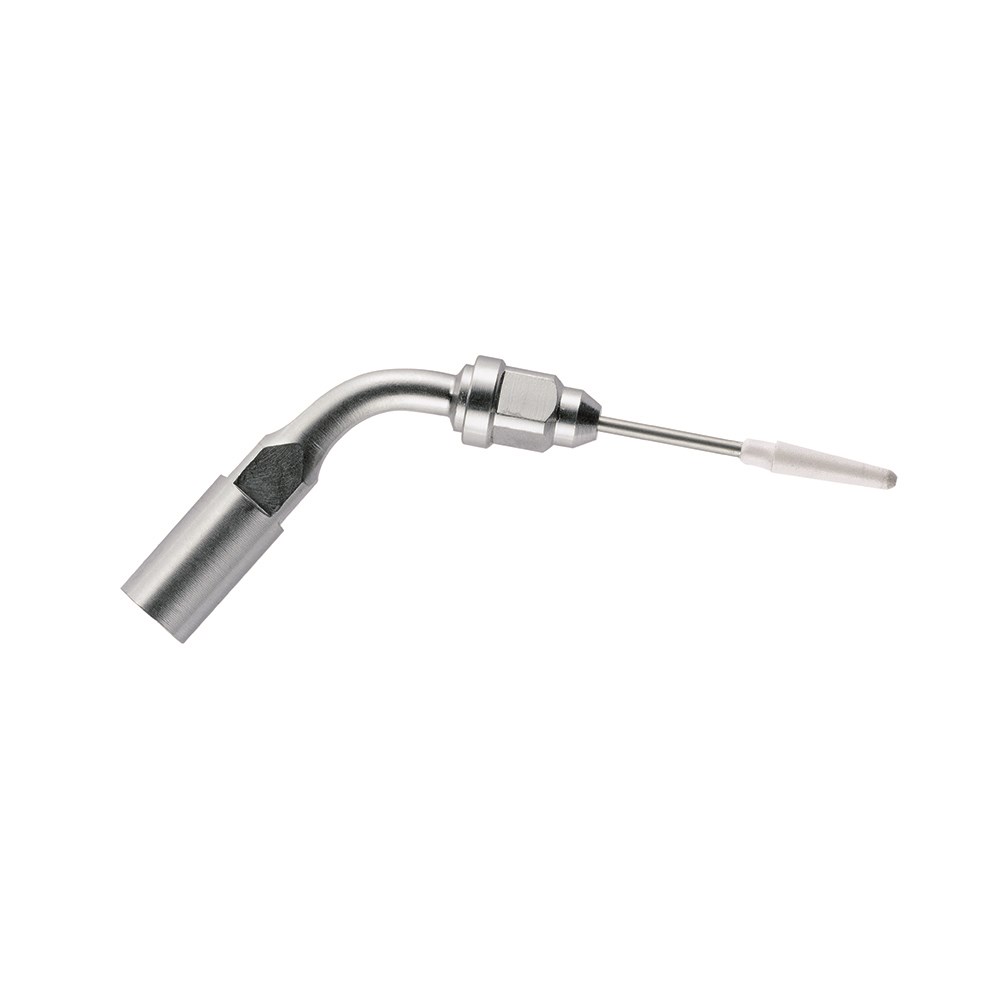
6. Ultrasonic / Piezoelectric tips
Probably the most common instrument in my protocols against mucositis and peri-implantitis. They come in many shapes and sizes, which important to adopt to the many possible anatomic configurations. The operator can control intensity and water spray, which makes it even more efficient. The rubber or plastic coating is essential when used in Mucositis or against smooth surface and prosthesis, which however inevitably limits the effectiveness and makes the tip more bulky and thus reduces accessibility. In the case of peri-implantitis treatment under flap, technically one could use a non-coated ultrasonic tip under fast water spray. In practice however this is a very unpleasant feeling for both operator and the patient, with a high pitch sound that few can withstand. The tip may easily break against metal and even if not it will wear and get inefficient very fast. So we have to stick to the coating, which however is shown to leave remnants of rubber or plastic on the rough surface. What could be the potential implications of such remnants is yet to be seen. Consequently, although I tend to use a lot the coated tips, in the case of flap surgery I use titanium brushes after the ultrasonic tip or at least finish the surgery with a “rinse and polish” ceremony as discussed at the start of this article!

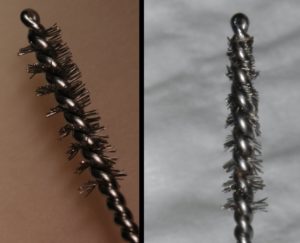
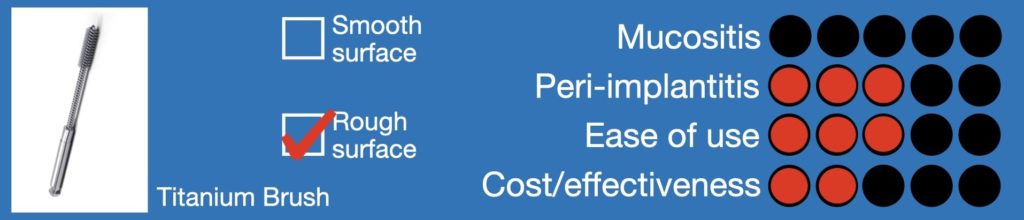
7. Titanium Brushes
A later evolutionary step in implant surface decontamination, the titanium brushes were aimed at eliminating both hard and soft deposits from implant rough surface. As these brushes also remove a superficial layer of titanium from the implant surface, one could see them also as a precursor to implantoplasty. I have used two types of such brushes, one the “vertical” brush and the other being a bristle.
The vertical brush is good in approaching the implant surface parallel with the axis of the implant, or possibly with a narrow angle. That makes it more efficient when the suprastructure can be removed. It is also a good choice to reach the bottom of intrabony defects, which would be unreachable with other instruments. At the same time it’s use in a horizontal angle is limited and thus it’s difficult to apply when there is a bulky prosthesis. It has been for a while a standard tool for intrabony peri-implant defects. My main concern is however that they get blunt very quickly and then become useless. It is a “single use” instrument, but in my hands, it usually takes 1 implant to blunt one brush, so it is a “single implant” rather than a “single patient” tool. Sometimes I cut off the blunt part so that I can use the rest for one more implant, but even so it remains an expensive option.

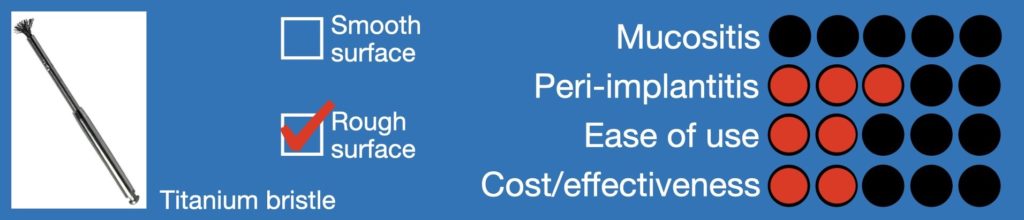
7a. The Titanium bristles
There is a variation of the titanium brush, which is rather a bristle. This is meant to be used from a horizontal angle, so it would actually be indicated for the defect types where the vertical brush is least effective. Then again however, this type of brush has not always worked very well in my hands. The bristles bent unevenly and make control of the brush difficult. In many cases it is easy to damage the neighbouring tissues, so I have found this type to be in general the least applicable.
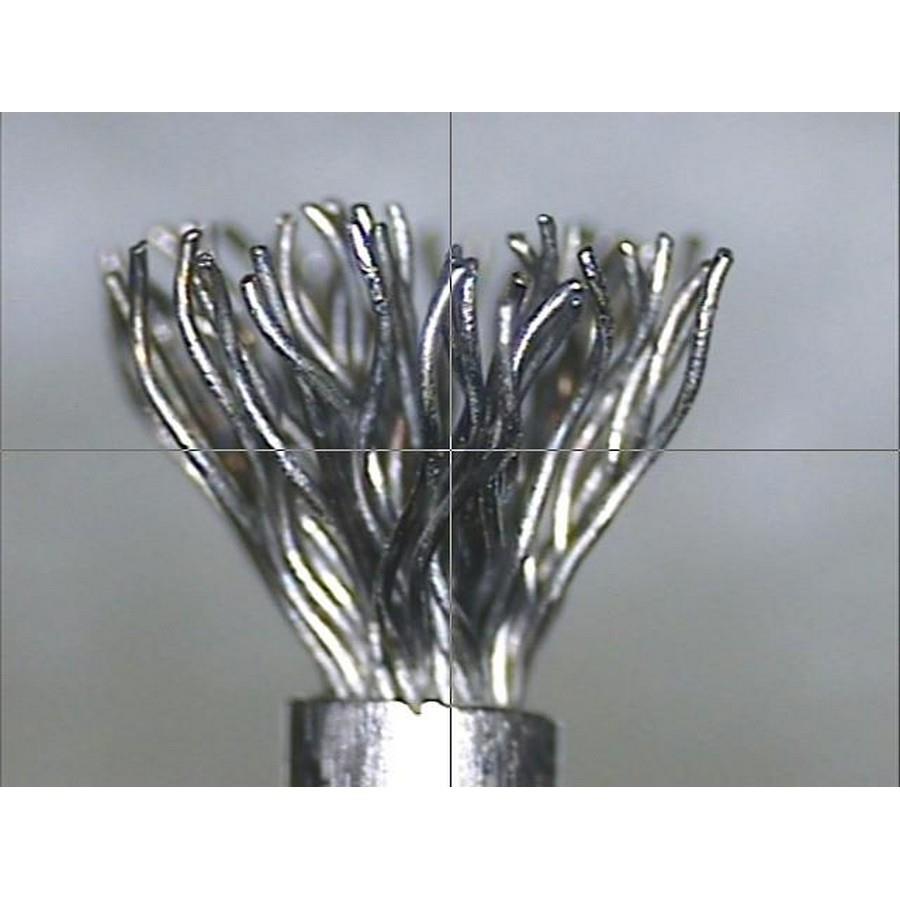
The bristles,
are aligned to offer best access from a horizontal angle. That might be useful in resective surgery or when the suprastructure is bulky and cannot be removed. However, as they spread quickly they are difficult to control and the risk of damaging neighbouring tissues is significant in tight defects.
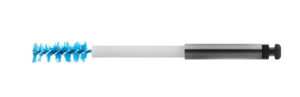
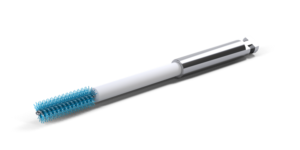
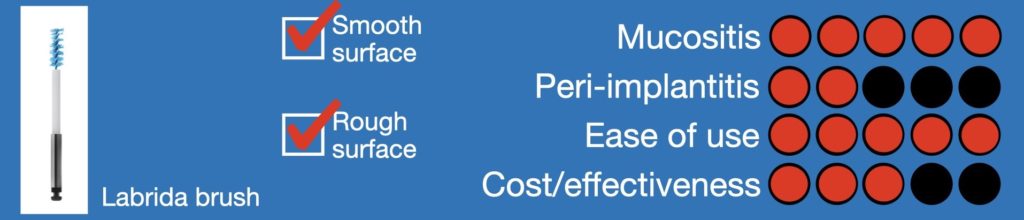
8. Labrida Brush
This brush is still something of a novelty and not fully assessed. I came across this brush 3 years ago during a trip Sweden. At that time we were writing our textbook on implant Complications with Dr. Martin Janda. As I was preparing the Mucositis/ Peri-implantitis chapter, many Swedish colleagues asked me about this brush, which was recently released by a small Swedish company and was starting to get popular. The bristles are composed of Chitosan, which is a biodegradable polymer with bacteriostatic properties. The consistency of the bristles feels somewhat harder than a “hard” toothbrush. So I decided to test it before writing our book chapter.
Since then I have used this brush a lot against Mucositis, as it is not harmful to smooth surface and prosthesis and allows for better access than most of the ultrasonic tips. As it is flexible and rather thin, it can penetrate easier in the inflamed peri-implant sulcus and my experience has been very positive. For the same reasons, it’s effectiveness against the rough surface of an implant in a flap surgery, is something I would question. I see now it is recommended for use in peri-implantitis surgery, as the bristles are biodegradable and any potential remnants would resolve. Given the consistency/ hardness of the bristles however, I would wonder how effective it would be against possible hard deposits. Still an interesting approach that can have a good range of indications once further documented.

6 thoughts on “Mechanical disinfection of implants: Tips and Tricks!”
Hi Nikos,
Thanks for sharing the tips. Very useful information indeed.
I use the Airflow (Perioflow) from EMS on all surgical cases and I have seen very good results, particularly in regenerative cases.
In Sydney, Axel Spahr runs Airflow workshops regularly.
Kind regards
Patrick Tseng
Thank you for your insight Patrick! I have also heard quite some positive feedback from colleagues. I have used it myself mainly in mucositis cases, but have not found it handy in Peri-implantitis for some reasons, including difficulty to access fully the deeper defects or posterior sites. I agree it deserves more attention!
Dental implants can last a long time when they are maintained with good oral hygiene at home and regular maintenance with your dental health care provider.
The book “Mechanical Disinfection of Implants: Dentures In Richmond Tips and Tricks” offers in-depth knowledge of implant disinfection methods. The article is well-researched and offers helpful guidance for dentists. Anyone working in the field who wants to learn more about implantology should read it.
This blog post offers a detailed and practical guide on the mechanical disinfection of dental implants, an essential aspect of implant maintenance. The article effectively outlines various techniques, tools, and best practices to ensure implant longevity and prevent peri-implantitis.
Thank you for your kind feedback and comments!